How to make a potty training chart in ten minutes
A potty training chart needs only three parts: a box per sit, a bigger mark per success, and a reward the child chose. This guide shows you how to make one in ten minutes with paper, a ruler, and stickers.

If you have been searching how to make a potty training chart, the answer is simpler than you think. You do not need fancy graphics or a printer. You need paper, a ruler, stickers, and about ten minutes. A potty chart that works has exactly three parts, and everything else is decoration.
The three parts every potty chart needs
A potty chart has three working parts: a box for each sit, a bigger mark for each success, and a reward line at the bottom. The reward line is where you write the prize your child picked. Everything else, colors, characters, shapes, is decoration.
The box per sit is the engine. Each time your child sits on the potty, they earn a small sticker or a check mark. That immediate feedback is what operant conditioning looks like in real life. It works because the child sees progress right away.
The bigger mark for success can be a star or a special stamp. It goes over the box when the child actually pees or poops. The reward line at the bottom shows the prize for filling the chart. Write the reward before you hang it.
The name line is not a working part, but it matters. A chart with the child's name on it feels like theirs. You can write it by hand or use the free builder to print it.
Why the try box matters most: it rewards the sit, not just the result. That keeps a child trying even on dry days. A chart that only rewards success can fizzle fast.
Build the three parts first, then let the child decorate. If you start with decoration, the chart looks busy and the working parts get lost. If you start with the three parts, the chart works and still looks fun.
- Box per sit: small sticker or check mark
- Bigger mark per success: star or stamp
- Reward line: prize the child picked
- Name line: optional but powerful
Step 1: pick the length
Decide how many sits the chart will hold before you draw. A week of morning and bedtime sits is 14 boxes. A more relaxed chart holds 20 boxes. The right length depends on your child's age and patience.
Younger children, ages 3 and 4, do better with shorter charts. They need to see the end quickly. Older children, ages 5 and up, can handle 20 boxes without losing interest.
The chart length sets the reward size too. A small prize like a new sticker sheet works for 14 boxes. A bigger prize like a small toy works for 20 boxes. Pick the length, then the reward.
| Chart length | Best for | Sticker per |
|---|---|---|
| 7 days | Ages 3 to 4 | Sit |
| 14 days | Ages 4 to 5 | Sit |
| 20 boxes | Ages 5 plus | Sit |
A 7 day chart is also great for a first try. It gives quick wins. You can always print or draw a second chart when the first one fills.
Step 2: draw or print the grid
You can draw the grid by hand in under two minutes. Use a ruler and a marker. Draw a rectangle, then divide it into equal boxes. Each box should be at least 1.5 inches wide so a round sticker fits inside.
If you prefer to print, the site has free charts ready to go. Every chart is a one page PDF in letter and A4. The boxes on every chart fit a 1.5 inch round sticker or a 1/2 inch star sticker.
Print at 100 percent, not fit to page. That keeps the boxes at sticker size. A chart that is scaled down will not fit the stickers right.
Draw the boxes at sticker size first, then add the decorations. If the boxes are too small, the stickers spill over the lines. If they are too big, the chart looks empty. 1.5 inches is the sweet spot.
Step 3: the child's part
Once the grid is drawn or printed, hand it over. Let the child decortae the border with crayons or markers. Let them color the title. This is their chart, not yours.
Let the child choose the sticker sheet. Round stickers, stars, dinosaurs, cars, whatever they like. The choice makes the chart feel personal. You can find sticker sheets on Amazon, and the site earns a commission if you buy through the links.
Let the child pick where it hangs. Offer two options: the bathroom wall or the back of the bathroom door. Both are at seat height. A child who chooses the spot is more likely to use the chart.
Do not decorate the boxes themselves. The boxes need to stay clear so the stickers stand out. Decoration goes on the border and the top of the page.
Step 4: hang it at seat height
Hang the chart low. The child should see it while sitting on the potty. Eye level for a 3 year old is about 30 inches from the floor. That is the height to aim for.
Use a plastic sleeve to protect the chart. A sheet protector or a zip bag works. Tape the sleeve to the wall with painter's tape. This keeps the chart dry and clean.
Keep the stickers in the bathroom. Put them in a small cup or bowl next to the chart. If the stickers are in another room, the child will forget. If they are right there, the child can grab one the second they sit.
Keep the chart and stickers in the same spot, every time. Consistency is what makes the chart work. A chart that moves around gets ignored.
Step 5: the first sit
The first sit sets the tone. Do not wait for a success. The moment the child sits on the potty, hand them a sticker. Let them stick it in the first box themselves.
Say something plain and warm: You sat on the potty. That is a big deal. Stick your sticker in the box. Do not add pressure about peeing. The sit is the win today.
If the child pees, add the bigger mark. Say: You did it, here is a star for the box. Let the child place the star over the sticker. The double mark makes the success feel bigger.
If the child does not pee, that is fine. The sticker is still earned. The box is full. The chart is working. Tomorrow you try again.
Boy and girl versions
The site has themed charts for boys and girls. They have the same three parts: boxes, success marks, and a reward line. Only the decoration changes. A rocket ship chart works the same as a princess chart.
Themed charts are useful because they give the child a visual hook. A child who loves trucks will check the truck chart more often. The theme does not do the work, the boxes do.
You can find the themed charts on the boys charts page and the girls charts page. Both print in color or ink saving black outline. The black outline version is great if the child wants to color it themselves.
When the chart is full
When the last box is filled, the reward is due. Give it right away. Do not wait for the end of the day. The child needs the connection between the full chart and the prize.
Take a photo of the child holding the chart. Print it or save it. This becomes a memory and a proof of the win. Some parents tape the photo to the bathroom mirror for a week.
Then decide: a new chart or no chart. Some children need a second chart to solidify the habit. Others are done and do not need the structure anymore. Follow the child's lead.
If you start a new chart, consider fading the reward. Make the reward smaller or wait for two full charts. The goal is the habit, not the prize. For more ideas, see the rewards guide.
Charts that go with this guide
Free one-page PDFs with a blank name line. Pick paper and ink once, every button changes.

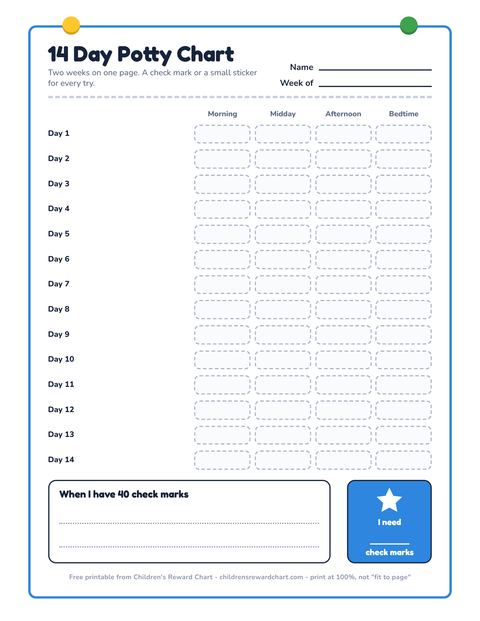
14 Day Potty Chart
14-day potty chart with four boxes a day: morning, midday, afternoon, bedtime.
Download letter PDF
Stickers and paper for the chart
The reinforcer has to be in the drawer before the first star is earned. Links go to Amazon and we may earn a commission.
Questions parents ask
How do I make a potty training chart?
Draw a grid with a ruler and a marker. Make each box at least 1.5 inches wide. Add a reward line at the bottom. Let your child decorate the border. Hang it at seat height and keep stickers nearby. That is the whole chart.
What should be on a potty chart?
Three things: a box for each sit, a bigger mark for each success, and a reward line. A name line helps too. Everything else is decoration. Keep the boxes clear so stickers fit and stand out.
How big should the boxes on a potty chart be?
Each box should fit a 1.5 inch round sticker or a 1/2 inch star sticker. That is the standard size on the printed charts. If you draw by hand, measure 1.5 inches wide and tall per box.
Where should a potty chart hang?
Hang it at seat height on the bathroom wall or the back of the bathroom door. The child should see it while sitting on the potty. Keep stickers in a cup right next to the chart.
How long should a potty training chart be?
One week, 14 days, or 20 boxes. Younger children, ages 3 to 4, do better with 7 days. Older children can handle 14 days or 20 boxes. Shorter charts give quicker wins.
Read next
Short guides that end at a chart you can print tonight.
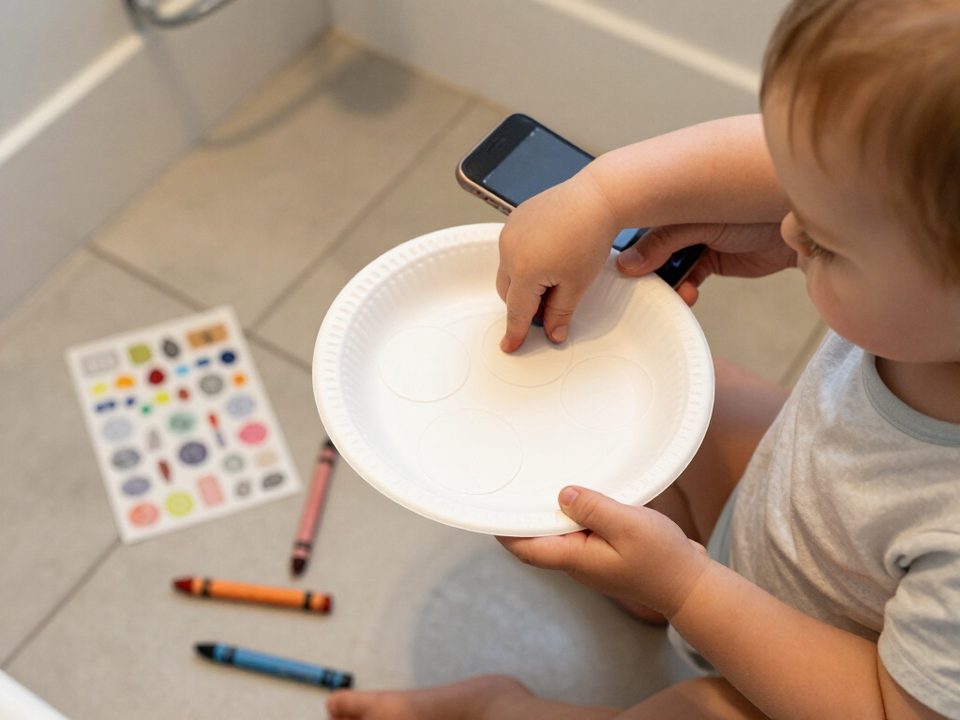
Homemade potty chart ideas that work in a week
Make a homemade potty chart that works in a week, using stickers and a few simple rules.

Best potty training rewards, by age and by stage
Pick the best potty training rewards by age and stage, and know which ones keep momentum without overpromising.

When to start potty training, and when the chart comes out
Know when to start potty training, and when to bring out the chart so it helps, not pressures.